How to Prevent Rot on Exterior Trim
How to Prevent Rot on Exterior Trim
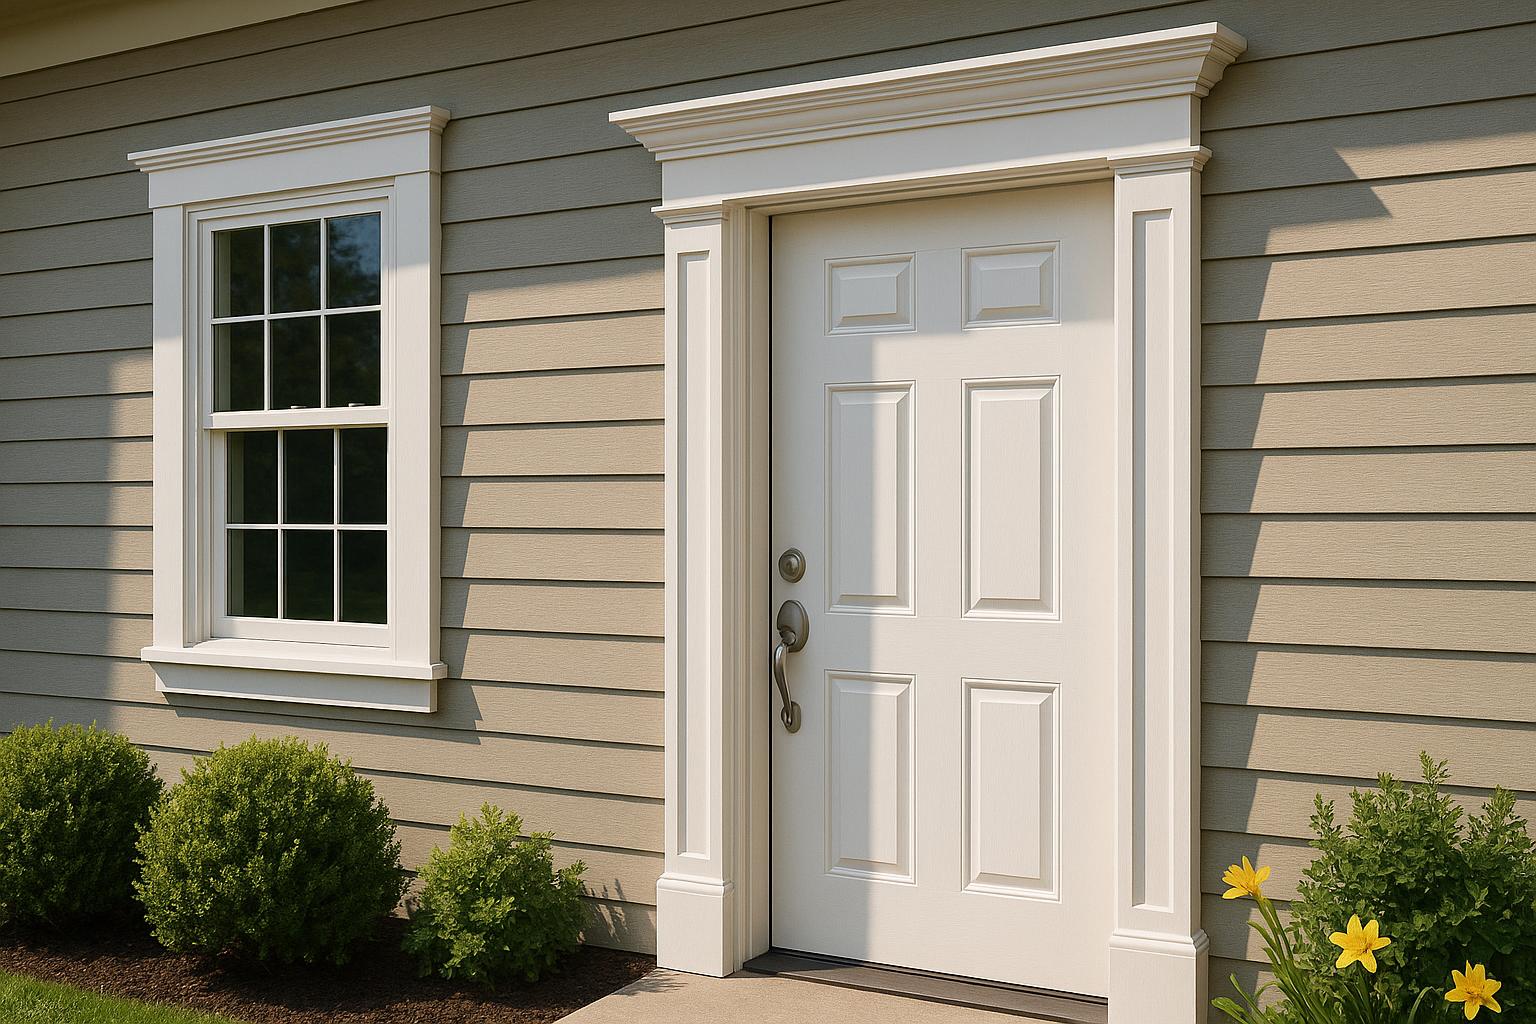
Stop rot before it starts. Rot on exterior trim can lead to costly repairs, water damage, mold, and even pest infestations. Here’s how you can protect your home:
- Inspect regularly: Check for cracks, peeling paint, or soft spots twice a year.
- Seal gaps: Use high-quality caulk to seal joints, corners, and edges.
- Prime and paint: Apply an oil-based primer and durable exterior acrylic paint.
- Ensure proper drainage: Clean gutters and install flashing to divert water away.
- Upgrade materials: Consider rot-resistant options like fiber cement trim for long-term durability.
Quick Tip: Regular maintenance is cheaper than repairs. If wood trim is too much trouble, fiber cement trim can last 50–75 years with minimal upkeep, saving you time and money.
Read on for detailed steps, tools, and materials to keep your exterior trim in top shape.
How to Stop Water damage at your Exterior Trim for Free
What Causes Exterior Trim Rot
Understanding the factors behind exterior trim rot can help you take the right steps to protect your home. While moisture is the primary culprit, several other conditions often contribute to wood decay.
Too Much Moisture and Poor Drainage
Excess moisture is the leading cause of wood rot. When wood’s moisture content climbs above 20–30%, fungal growth begins. Once it surpasses 30%, the damage can escalate quickly .
"The primary cause of wood rot around windows, doors, and siding is water running toward your home." – Weather Tight Corp.
Rain and humidity are obvious contributors, but poor water management around your home often makes the situation worse. For example, clogged or broken gutters can send water cascading down your exterior trim instead of directing it safely away . Missing or damaged flashing around windows and doors can also allow water to collect on the casings and seep into the wood frame.
Trim that comes into contact with damp soil or sits too close to wet ground is another major risk. Wood in these conditions can absorb moisture continuously. Even minor leaks can introduce enough water to fuel decay .
High humidity and poor ventilation compound the problem. Condensation can form in areas with limited airflow, keeping wood damp for long periods . Temperature fluctuations also play a role, as they affect wood moisture levels and encourage fungal growth.
Beyond water issues, compromised finishes can leave your trim vulnerable to moisture infiltration.
Damaged Sealing and Protective Finishes
The caulk, paint, and sealants on your trim act as a shield against water. When these protective layers fail, moisture can penetrate directly into the wood fibers.
"For wood to rot, it takes oxygen, a certain temperature, and a bit of moisture to create wood-eating fungi." – Mike Katounas, Owner, Home Works Painting
Cracked caulk can trap water, creating pockets of moisture that speed up fungal growth. Similarly, peeling or chipped paint exposes bare wood, which absorbs water every time it rains.
Once water infiltrates unsealed wood, fungi can thrive in temperatures ranging from 32°F to 390°F. Areas where rainwater pools due to poor sealing become prime spots for rot. Cut ends and joints between trim pieces are especially vulnerable, as they’re often not sealed properly during installation, allowing water to penetrate deeper into the wood.
While moisture is the main driver, environmental conditions like sunlight and weather wear also play a role in trim deterioration.
Sun Damage and Weather Wear
Although moisture initiates rot, sunlight can weaken wood by breaking down its natural defenses. UV rays degrade lignin, the compound that helps reinforce wood fibers.
"UV light is responsible for most damage to exposed wood because it changes or destroys the wood's lignin, a component of wood that hardens and strengthens the cell walls. In more scientific terms this process is called photo-oxidation." – Perma-Chink Systems
This process, known as photo-oxidation, weakens the wood, making it more prone to cracking and allowing moisture to seep deeper . Temperature swings further stress the wood, causing it to expand and contract, which can lead to cracks in paint and other protective coatings. On top of that, wind carries abrasive particles that wear down paint, exposing the wood to more UV damage and moisture.
When these factors - UV damage, temperature fluctuations, and moisture - combine, the rot process can progress quickly if left unchecked. Proper maintenance and timely repairs are key to preventing extensive damage.
Tools and Materials You'll Need
These supplies lay the groundwork for the rot-prevention methods covered in the guide. Make sure to gather the right tools for prepping surfaces, sealing, and finishing.
Sealants, Primers, and Paints
To keep water out, use exterior-grade caulk. Opt for a flexible, paintable product that can handle temperature changes without cracking. This is ideal for sealing gaps around windows, doors, and joints where water might sneak in.
When it comes to primers, you’ve got two main options:
- Acrylic primers: Easy to apply, clean up with water, and work well on surfaces like wood, laminate, and metal (as long as there’s no rust).
- Oil-based (alkyd) primers: Great for blocking stains, especially on bare wood, and suitable for both interior and exterior use.
For exterior paint, pick a high-quality product designed to withstand tough weather. Today’s acrylic paints often last longer on wood than older oil-based options. Plan for at least two coats to ensure proper coverage and protection.
You’ll also need the right tools for the job. A caulk gun works for larger cartridges, while squeeze tubes are better for smaller tasks. To create smooth, even caulk lines, grab a caulk finishing tool - they’re inexpensive and easy to use. For painting, stock up on quality brushes, rollers, and, for bigger projects, consider a paint sprayer.
Once you’ve got these basics, move on to materials that provide extra moisture protection.
Other Materials for Moisture Control
Beyond caulk and paint, there are additional materials that help keep moisture at bay. Start with sandpaper and scrapers to remove old, damaged finishes. If you’re dealing with old sealant, use caulk removal tools for a clean slate.
Flashing is another must-have. This thin, waterproof material is installed around windows, doors, and other openings to guide water away from vulnerable areas.
For advanced drainage, consider Drain-N-Dry Lath, a product that combines lath, a rainscreen, and a water-resistant barrier. It eliminates the need for a secondary barrier while boosting moisture control.
For sealing larger gaps or seams, use weather-resistant sealants that go beyond basic caulk. Choose a high-quality, water-repellent option that matches your trim material.
If your trim is badly damaged, look into rot-resistant replacements like cellular PVC, fiberglass, or naturally durable woods like cedar or redwood.
Other moisture-control essentials include:
- Moisture and air barriers to install under siding.
- Back-flashing materials (like house wrap or felt paper) for butt joints.
- Capillary break materials to protect foundation areas.
With these tools and materials, you’ll be well-equipped to tackle any rot-prevention project.
Step-by-Step Guide to Preventing Rot
With your tools and materials ready, follow these steps to keep your trim in great condition for years to come.
Inspection and Surface Preparation
Check your trim twice a year - once in spring and again in fall - for any early signs of wear or damage. Press the wood to ensure it’s still solid, and look out for cracks, discoloration, peeling paint, or any signs of mold or mildew.
Start by removing peeling paint and filling nail holes or gaps. Sand the surface until it’s smooth, then wash the trim using a mild detergent mixed with water to get rid of dirt, grime, and mildew. For tougher stains, a cleaner with trisodium phosphate (TSP) can help. Once the trim is completely dry, use an exterior-grade wood filler to patch any remaining imperfections, and sand again to create a smooth, even surface ready for primer and paint.
Sealing and Caulking
A good caulking job is your first defense against water damage. Focus on sealing around windows, doors, and siding joints where moisture tends to sneak in. This step not only helps prevent rot but also keeps drafts and pests at bay.
Use a high-quality siliconized acrylic caulk, like GE Painter's Pro caulk, for trim and other paintable areas. For gaps wider than 1/4 inch, place a backer rod in the gap before applying the caulk. To apply, tape the edges, cut the caulk tube tip at a 45° angle, and run a steady, even bead. Smooth the bead immediately using a caulking tool or a soapy finger.
Remove the painter’s tape while the caulk is still wet, and clean up any excess with a damp cloth. Pay extra attention to end grains and cut edges, as these areas are especially vulnerable to moisture.
Priming, Painting, and Finishing
Priming is a must for protecting your trim, especially if it’s bare wood or composite, or if you’re changing to a drastically different color. An oil-based primer is a great choice for both bare and previously painted wood, giving you a solid base for your finish.
Choose a day with moderate weather (50°F–85°F) for the best results. Sand any rough spots with fine-grit sandpaper before painting to ensure the paint adheres well.
When painting, use high-quality brushes for detailed areas and rollers for larger sections. Apply two coats of durable acrylic paint, letting each coat dry completely before adding the next.
Installing Flashing and Ensuring Proper Drainage
Once the painting is done, take steps to divert water away from your trim. Install flashing around windows, doors, and other openings to guide water away. Clear your gutters and downspouts to prevent water from pooling near your home.
Check that your gutters and downspouts are free of debris and channel water away from your foundation and trim. Proper drainage is key - standing water can speed up the rotting process. Make sure flashing overlaps correctly and directs water away from the trim, and keep gutters clean and functional to protect your home.
sbb-itb-85e0110
Maintenance Tips for Long-Term Protection
Once your trim is sealed and painted, keeping up with regular care is key to making those protective measures last. A little ongoing effort can save you from expensive repairs down the road.
Regular Inspections and Repairs
Plan your inspections for spring and fall when the weather is mild. This is the perfect time to check for any damage caused by winter's cold or summer's heat. Look closely at the exterior for cracks, chips, or dents, especially around eaves and the bottom edges of the trim.
Check the wood's firmness during these inspections. Keep an eye out for loose or warped panels, and ensure the trim isn’t coming into contact with soil or mulch. Signs of moisture damage - like mold, peeling paint, or soft spots - should be addressed immediately.
Tackle small issues early. Use exterior-grade caulk to fill minor cracks, and for larger damage, replace the affected section of trim. If you notice peeling paint, scrape it off, sand the area smooth, apply primer, and repaint with quality exterior paint. Remember, damaged trim isn’t just an eyesore - it can signal deeper issues with the wall behind it and invite pests like termites.
After big storms, especially those with heavy rain, wind, or hail, do an extra inspection. Storms can weaken your trim’s defenses, allowing moisture to seep in before your next scheduled check.
Regular care doesn’t stop at inspections. Ensuring proper drainage around your home is just as important.
Keep Gutters and Downspouts Clear
Good water management is essential for protecting your trim. Clogged gutters can redirect water where it doesn’t belong, so make it a habit to clean them at least twice a year - once in spring and again in fall. If your home is surrounded by trees, you might need to clean more often. Use a plastic scoop to remove leaves and debris, then flush the gutters and downspouts with a garden hose to clear out any remaining buildup.
Inspect your downspouts carefully during each cleaning. Make sure they’re free of blockages, using a plumber’s snake or auger for stubborn clogs. Wire strainers at downspout openings can help keep large debris out.
While cleaning, check your gutters for any signs of damage, like cracks, rust spots, loose fasteners, or sagging sections. Water always takes the easiest path, so a damaged gutter can send water toward your trim instead of away from your home.
Gutter guards can be a worthwhile investment to cut down on debris and reduce how often you need to clean. Additionally, trim back overhanging branches that drop leaves and twigs into your gutters. These small steps go a long way in keeping your drainage system working smoothly, protecting your trim from water damage, mold, and pests.
When to Consider Rot-Resistant Alternatives
Even with diligent care, wood trim eventually succumbs to the effects of time and the elements. If you’re constantly dealing with rot or high maintenance demands, it might be time to explore more durable options. One standout choice is fiber cement trim, which mimics the appearance of wood but avoids many of its common pitfalls.
Certain warning signs can signal when it’s time to upgrade. Look for visible decay, soft or spongy spots (easily tested with a screwdriver), or areas that need repainting far too often - sometimes within just a couple of years. Warping, buckling, or noticeable gaps are also red flags, as they allow moisture to infiltrate and cause further damage.
"Rotted trim is detectable by the visible signs associated with wood that is deteriorating. Trim rotting or dry rot often appears to be run-down, the paint cracked, flaking, or peeling. Rotted trim will also tend to appear discolored or darker in color and may have signs of mold, fungus, or green algae growing on the exterior."
Recognizing these issues early can help you decide when to make the switch to fiber cement trim.
Benefits of Fiber Cement Trim
Fiber cement trim addresses many of the challenges associated with wood, especially in areas prone to moisture. Unlike wood, it doesn’t warp, rot, or attract pests, offering a longer-lasting solution for your home’s exterior. It’s specifically designed to withstand the elements that typically degrade wood, such as water, insects, and fire.
One standout feature is its fire resistance. Fiber cement trim boasts a flame spread rating of 0, a Class I material classification, and a 1-hour fire resistance rating, meaning it won’t ignite when exposed to direct flames or high heat. Additionally, pests like termites and carpenter ants can’t damage it, as the material is not a food source for them.
Maintenance is another area where fiber cement shines. While wood trim often needs repainting every 5 to 10 years, along with ongoing caulking and repairs, fiber cement requires only occasional sealing and painting. Non-backcoated fiber cement can last up to 50 years, while backcoated versions can endure as long as 75 years. Its dimensional stability also reduces the risk of cracks or gaps caused by expansion and contraction.
Wood vs. Fiber Cement Trim Comparison
Here’s a closer look at how fiber cement trim stacks up against traditional wood trim:
| Feature | Wood Trim | Fiber Cement Trim |
|---|---|---|
| Durability | Prone to rot, insects, and weather damage | Resistant to rot, insects, fire, and weather |
| Maintenance | High; frequent painting and sealing required | Low; minimal upkeep |
| Initial Cost | $6 to $10 per sq. ft. | $10 to $12 per sq. ft. |
| Lifespan | Shorter; requires regular upkeep | 50–75 years |
| Fire Resistance | Low; can contribute to fires | High; Class I fire rating |
| Moisture Resistance | Absorbs water; prone to warping | Does not absorb moisture |
Although the initial cost of fiber cement trim is higher - ranging from $10 to $12 per square foot compared to wood’s $6 to $10 - it often pays off in the long run. With reduced maintenance and a significantly longer lifespan, fiber cement trim saves both time and money over the years. Plus, it can enhance your home’s value, delivering a return on investment (ROI) of 70% to 85% or more. Individual Hardie Trim boards start at $8.24, with average prices around $39 per piece.
Bayshore Exteriors: Expert Installation for Durable Solutions

Switching to rot-resistant trim requires careful installation to ensure optimal performance. Bayshore Exteriors, a trusted name in James Hardie siding and exterior remodeling, specializes in helping homeowners choose materials tailored to their home’s specific climate and moisture conditions. Their expertise ensures a precise fit and avoids costly mistakes.
Proper installation is critical for fiber cement products. Errors in cutting, fastening, or sealing can reduce durability and even void manufacturer warranties. Bayshore Exteriors brings years of experience with James Hardie products, using proven techniques to maximize both the appearance and longevity of your trim. They also take a comprehensive approach, coordinating trim replacement with other exterior components like siding, windows, and drainage systems to create a seamless, moisture-resistant home envelope.
For homeowners tired of the ongoing challenges of wood trim, Bayshore Exteriors offers the knowledge and skill to transition smoothly to fiber cement trim. The result? Long-lasting protection and peace of mind for years to come.
Conclusion: Protecting Your Home's Exterior Trim
Taking steps to protect your home's exterior trim is about more than just keeping it looking good - it’s about maintaining its structural integrity too. Regular inspections, proper sealing, and high-quality painting can stop small issues from turning into expensive repairs. Plus, these efforts help preserve your home’s energy efficiency and overall value.
If you’re looking for a long-lasting solution, rot-resistant fiber cement trim is worth considering. Though it costs $10 to $12 per linear foot, it can last up to 50 years with very little maintenance. Compared to the frequent upkeep required for wood, this option offers significant savings over time.
For the best results, professional installation is key. Whether you choose wood or fiber cement trim, expert installation ensures that everything is done right, avoiding costly mistakes that could affect warranties or durability. Quality materials paired with skilled craftsmanship provide the best protection for your home.
FAQs
How can I tell if my exterior trim is starting to rot, and what should I look for?
To identify early signs of rot on your exterior trim, pay attention to discoloration - this could appear as dark spots or unusual hues like yellow, white, or green. Another telltale sign is a soft or spongy feel when pressing on the wood, which often indicates decay. Additionally, keep an eye out for cracks, peeling paint, or swelling, particularly in areas that are frequently exposed to moisture.
Regular inspections are key to catching these problems early. Check your trim closely after heavy rain or during seasonal shifts, focusing on areas around windows, doors, and other spots vulnerable to water exposure. Taking action as soon as you notice these signs can help you avoid more extensive damage and expensive repairs later.
What are the maintenance and cost benefits of fiber cement trim compared to wood trim?
Fiber cement trim stands out as a practical alternative to wood trim, especially when it comes to reducing maintenance efforts and costs over time. Unlike wood, fiber cement resists rot, pests, and fire, eliminating the need for constant scraping, repainting, or re-caulking. This makes it a dependable, low-maintenance choice for exterior trim.
Its durability is another key advantage. Fiber cement trim can last 50 years or more with very little upkeep, saving homeowners from frequent repairs or replacements. On the other hand, wood trim often demands more attention, such as regular repainting and sealing, which can drive up long-term expenses. For anyone looking for a reliable and hassle-free option, fiber cement trim offers a lasting solution that pays off in the long run.
What steps should I take during routine inspections to keep my exterior trim in great shape?
To keep your exterior trim in good shape, start by looking for any signs of trouble - this includes rot, cracks, peeling paint, or moisture damage. Regular cleaning is also key to removing dirt, mildew, and debris that can speed up wear and tear. If you spot any loose or damaged sections, take care of them right away with repairs or replacements. After heavy storms or harsh weather, give your trim a quick once-over to catch any new issues before they get worse. Lastly, make sure all surfaces are sealed and painted properly to shield them from decay and help your trim last longer.