James Hardie Siding Maintenance: What to Know
James Hardie Siding Maintenance: What to Know
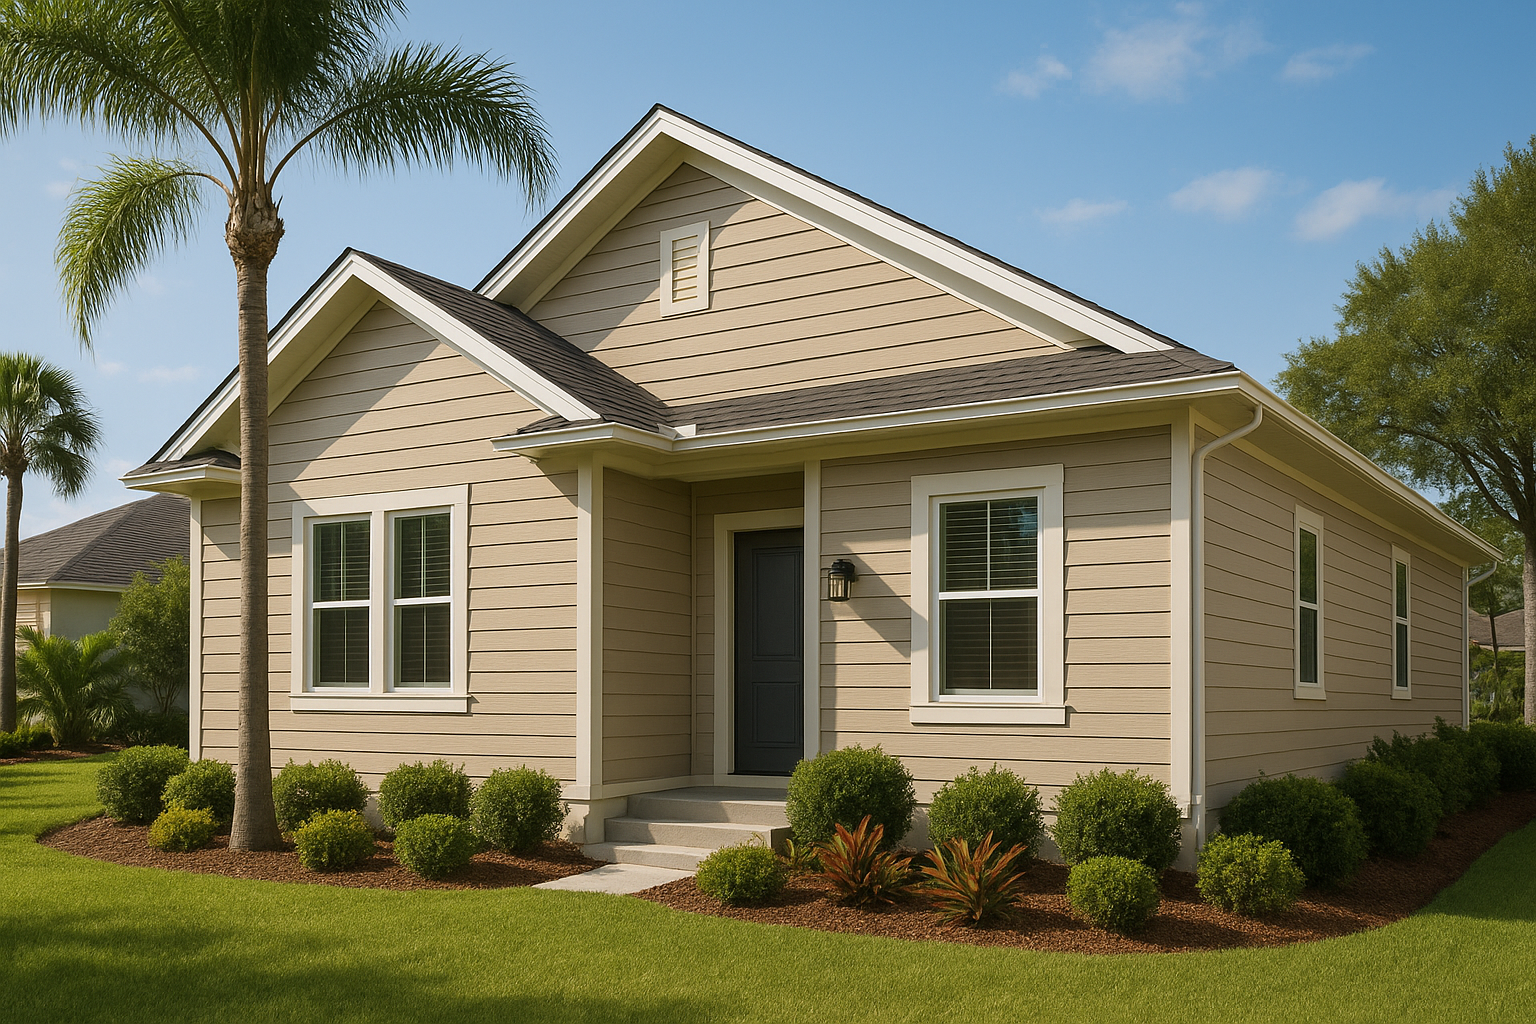
Maintaining James Hardie siding is straightforward but crucial, especially in Florida’s challenging climate. Regular care ensures your siding lasts longer, looks great, and stays protected against issues like mold, rot, and damage from intense sun or storms. Here’s what you need to know:
- Cleaning: Wash your siding every 6–12 months (more often in coastal or humid areas). Use a garden hose, mild soap, and soft brushes. Avoid pressure washers or harsh chemicals like bleach.
- Inspections: Check for cracks, loose boards, or damaged caulking annually. Pay close attention to areas near windows, doors, and trim.
- Repairs: Re-caulk every 3–5 years and fix chips or dents promptly using touch-up paint or board replacement if necessary.
- Climate Prep: For Florida homes, clean off salt spray regularly and inspect siding before hurricane season. Use proper installation and materials to handle intense sun, heat, and storms.
- Gutters & Landscaping: Keep gutters clean and ensure plants and sprinklers don’t damage siding.
A seasonal maintenance schedule and detailed record-keeping can help protect your investment and warranty. For major repairs or installations, consider professional services tailored to Florida’s conditions.
How to Clean & Maintain James Hardie Siding | Elevate Exteriors
Cleaning and Care Basics
Keeping your James Hardie siding clean is the cornerstone of its maintenance. While fiber cement siding is known for being low-maintenance, a consistent cleaning routine ensures it stays in top condition and keeps your home looking its best.
How often should you clean your siding?
For most James Hardie siding, cleaning every 6 to 12 months is recommended to maintain its appearance and prevent dirt buildup. However, Florida's climate might require more frequent care. If you live in areas with heavy salt spray or high humidity, you may need to adjust your cleaning schedule to address these conditions.
Once you’ve established a regular cleaning routine, it’s equally important to use the right tools and techniques to protect the siding’s finish.
Tools and techniques for safe cleaning
When it comes to cleaning James Hardie siding, gentle methods are key. A simple garden hose provides enough water pressure to clean effectively without risking damage to the siding or its finish. Start cleaning from the bottom of the siding and work your way up. This prevents dirty water from streaking over the areas you’ve already cleaned. When rinsing, reverse the process - begin at the top and let gravity help wash away loosened dirt and cleaning solution.
For tougher stains, a soft brush or cloth works well. Brush in straight lines, following the direction of the siding boards. For hard-to-reach spots, such as on taller homes, an extension pole with a soft brush attachment is a safer alternative to using a ladder. These methods not only clean effectively but also help preserve the siding's longevity. Avoid using pressure washers, as the high-pressure spray can force water behind the siding and damage its protective finish.
Approved cleaning solutions and what to avoid
Choosing the right cleaning solution is just as important as using the correct tools. A mix of mild dish soap and water is a reliable option for general cleaning. Combine about 1 tablespoon of liquid dish soap with 1 gallon of water for an effective solution. If you’re dealing with mildew or algae, opt for a cleaner specifically designed to tackle organic growth without harming the siding. Always follow the manufacturer’s dilution instructions to ensure safe use.
"Cleaning your siding will help prevent water intrusion and sustain the beauty and value of your home." - StateLine Exteriors
Steer clear of harsh chemicals like bleach-based cleaners, ammonia, or abrasive products, as these can degrade the siding's protective coating and lead to premature wear. Similarly, avoid using steel wool, abrasive pads, or stiff brushes that could scratch the surface. Oil-based cleaners should also be avoided, as they can leave behind residues that attract dirt and interfere with future paint applications. Preserving the protective finish is essential for long-term durability.
When mixing any cleaning solution, always dilute it with water and test it on a small, hidden section of the siding first. Once applied, let the solution sit for 5 to 10 minutes to loosen dirt and organic buildup before scrubbing or rinsing it off. This ensures a thorough clean without damaging your siding.
Preventive Maintenance Tips
Taking care of your James Hardie siding with a few proactive steps can save you from expensive repairs and help it last longer. By addressing potential problems early, you can keep your siding looking great and performing as it should. These tips go hand-in-hand with regular cleaning to ensure your siding stays in top shape over the years.
Annual Inspections and Common Problem Areas
Set aside time once a year for a detailed inspection of your siding. Pay close attention to areas where the siding meets trim, windows, doors, and rooflines. These spots are more prone to water intrusion and wear, especially in Florida’s humid and stormy conditions.
Look closely at caulk lines, fasteners, and transition zones. Over time, caulk can crack or shrink, creating gaps where moisture can sneak in. If you spot any gaps, re-seal these areas promptly. Check for loose or missing siding pieces, nail pops, or fasteners that may have worked loose, as these can also let water in. Don’t forget to inspect siding near the ground, where landscaping can expose it to extra moisture. Also, examine seals around penetrations like electrical outlets, vents, and light fixtures to ensure they’re intact. These inspections and fixes will help preserve both the appearance and structural strength of your siding.
Landscaping and Sprinkler Considerations
After inspecting your siding, take a look at your yard. How you maintain your landscaping can have a big impact on your siding’s condition. For example, overgrown plants can scrape against the siding, damaging its protective paint layer and trapping moisture against the surface.
Trim back vegetation so it stays at least six inches away from the siding. Keep soil and mulch levels low to prevent them from touching the siding, as prolonged contact with damp materials can stain or damage its surface.
Sprinkler systems are another factor to consider. Adjust sprinkler heads so they don’t spray directly onto your siding or saturate the ground near your home’s foundation. When using lawn equipment like trimmers or mowers, be careful to avoid hitting the siding, which can cause chips or scratches.
If you live in a colder region, avoid using rock salt or deicing salts near your siding during winter. These can corrode the material over time. Instead, opt for sand or gravel to manage ice and snow. These simple steps can go a long way in protecting your siding from unnecessary wear and tear.
Gutter Maintenance for Long-Term Siding Protection
Your gutters play a key role in keeping water away from your siding. When gutters are clogged or damaged, water can overflow and run down the siding, causing stains, peeling paint, and even moisture problems behind the panels.
To prevent this, clean your gutters twice a year - once in the spring and again in the fall. Clear out leaves, dirt, and debris that might block water flow. Make sure your gutters are securely attached, properly sloped toward the downspouts, and free of leaks.
It’s also important to check that downspouts direct water at least three to four feet away from your home’s foundation. Use splash blocks or extensions if needed. During your annual inspection, take a moment to examine fascia boards and trim for any signs of damage. These gutter maintenance habits will help protect your siding and keep it looking its best for years to come.
Florida Climate Considerations
Florida's unique climate presents challenges that make proper care of James Hardie siding essential. With salt-laden air, high humidity, and frequent severe weather, maintaining your siding requires a tailored approach. Fiber cement siding is specifically designed to endure these conditions better than many other materials. By combining routine care with Florida-specific practices, you can protect your siding from the state's extreme climate.
Handling Salt Spray and High Humidity
Coastal areas in Florida expose siding to constant salt spray and moisture. One of the advantages of James Hardie siding is its resistance to water damage, mold, and mildew. Unlike wood siding, which absorbs moisture and swells, or vinyl and aluminum siding, where water can accumulate, fiber cement siding maintains its stability even with fluctuating humidity levels.
However, coastal exposure does require extra cleaning to remove salt buildup. Thanks to its non-porous design, James Hardie siding naturally resists mold and mildew. If these issues do occur, the cleaning methods mentioned earlier can also address salt and mildew problems.
Proper installation is critical for coastal homes. Ensure your siding is installed by an Elite Preferred contractor who adheres to James Hardie's guidelines, including correct nailing patterns, to enhance its ability to repel salt spray.
Preparing Siding for Hurricane Season
In Florida, preparing your siding for hurricane season is just as important as regular maintenance. Start your preparations about a month before the season begins to allow enough time to address any issues. Inspect your siding for loose boards, cracks, or damage, and repair them promptly to prevent water intrusion during storms. Securing the siding is particularly important, as hurricane-force winds can loosen and detach improperly fastened planks.
James Hardie siding is designed to endure hurricane conditions. It is approved for use in High Velocity Hurricane Zones by Miami-Dade County and is certified flood-resistant by FEMA.
"Our goal is to build a house that will be there, and not just satisfy a checklist for today. We strive to build for a hundred years, if not longer", says Marianne Cusato, Partner in Charge of Design and Development at Cypress Community Development Corp.
Additionally, secure or bring indoors any outdoor items like patio furniture, potted plants, or decorations that could become dangerous projectiles during strong winds. Avoid starting major siding projects within a month of hurricane season to prevent being caught mid-project if a storm hits.
Impact of Intense Sun and Heat on Finishes
Florida's relentless sun and heat can take a toll on siding finishes. Fortunately, James Hardie's ColorPlus finish is specially designed to withstand these conditions. It comes with a warranty against cracking, splitting, warping, or edge checking caused by water, heat, or freezing temperatures.
Regular cleaning is essential to prevent dirt and moisture buildup that can damage finishes. Pay close attention to areas that receive the most direct sunlight throughout the day.
For added protection, the Hardie Weather Barrier helps shield your home by preventing water damage and mold formation.
"You need to make sure that at the core your products are built with your climate in mind", emphasizes Marianne Cusato.
Hurricane expert Josh Morgerman highlights the importance of durable siding in Florida's climate, describing it as a home's "coat of armor".
sbb-itb-85e0110
Repairs and Repainting
Even the toughest siding will occasionally need a little TLC to keep it looking good and performing well. Taking care of minor repairs early can save you from expensive replacements down the road. Knowing when and how to tackle common fixes can help you stay ahead of potential problems.
When and How to Re-Caulk
In Florida’s climate, caulking around windows, doors, and trim typically needs replacing every 3–5 years. To re-caulk, start by removing the old caulk using a removal tool or utility knife. Clean the area thoroughly and let it dry completely. Then, apply a high-quality, paintable acrylic latex caulk at a 45° angle, smoothing it out with your finger or a tool. Avoid silicone caulk if the area will be painted - it’s not compatible with paint.
For James Hardie siding, paintable acrylic latex caulk is the best choice. It stays flexible with temperature changes and adheres well to fiber cement surfaces. When applying, aim for a steady, continuous bead to create a clean, concave finish that effectively sheds water.
Once the caulking is done, it’s time to check for fastener issues to ensure everything stays secure.
Fixing Chips, Dents, and Fastener Issues
Small chips and scratches are pretty common. Start by cleaning the damaged area, letting it dry, and applying touch-up paint if necessary. Check the fasteners as well - nails should be flush with the surface but not driven too deep.
For dents or gouges, surface-level damage can often be fixed with touch-up paint. However, if the damage compromises the board’s structure or exposes the fiber cement core, you’ll need to replace the board to protect your warranty.
Fastener issues can show up as loose boards or nails that have worked their way out over time. If you notice loose boards, secure them with galvanized or stainless-steel nails, following James Hardie’s guidelines for placement and spacing. If the structural integrity of a board is affected, replacement is the safest option to maintain both protection and warranty coverage.
After completing any repairs, you might want to repaint to ensure a seamless finish.
Repainting Recommendations for Siding
If your siding has a factory-applied ColorPlus finish, you’re in luck - it’s designed to last over 15 years. For areas that have been field-painted or touched up, use 100% acrylic latex paint specifically made for fiber cement surfaces. Avoid oil-based paints, as they don’t adhere well and can cause issues over time.
Before painting, make sure the siding is clean and dry. Prime any bare fiber cement areas with an acrylic primer, then apply two thin coats of paint. Keep a record of the paint brand, color, and application date, as this information is often required for warranty purposes.
Acrylic latex paints are ideal because they expand and contract with temperature changes while maintaining strong adhesion. If you’re in Florida, be cautious with dark colors - those with a Light Reflectance Value (LRV) below 55. They can absorb too much heat under the intense sun, potentially causing damage and voiding your warranty.
For the best results, paint during mild weather, avoiding direct sunlight and high humidity. Applying two thin coats is better than one thick one, as it provides better coverage and durability over time.
Maintenance Schedule and Record Keeping
Keeping your James Hardie siding in top shape doesn’t have to be complicated. A well-organized seasonal maintenance plan paired with diligent record-keeping ensures your siding stays in great condition, protects your warranty, and makes future upkeep easier. This schedule works alongside the cleaning and repair routines mentioned earlier to create a complete care strategy.
Basic Annual Maintenance Schedule
Spring (March-May) is ideal for your yearly inspection. Walk around your home to check for winter damage like loose boards, cracked caulking, or areas where plants may be touching the siding. Trim any vegetation that’s grown too close during the colder months to prevent long-term issues.
Early Summer (June) is the time for a deep clean before the heat and hurricane season kick in. Use a garden hose to rinse your siding, focusing on spots under eaves and around windows where dirt tends to collect. If you live near the coast, this step is even more critical to remove salt buildup that can harm the siding over time.
Late Summer (August-September) is all about hurricane preparation in Florida. Secure loose outdoor items that could hit your siding during storms, and inspect for any new damage. Check and clean your gutters to prevent overflow, which can quickly harm your siding.
Fall (October-November) brings cooler weather, making it the perfect time for painting or repairs. Inspect your caulking and replace it if needed, as the lower humidity helps it cure properly and last longer.
Winter (December-February) is low-maintenance, but it’s a great time to organize your records and plan any major siding projects for the upcoming year.
For coastal homes, add an extra rinse every six months to manage salt spray. If you have sprinklers, check monthly to ensure they’re not hitting your siding directly, as constant moisture can cause long-term problems.
Keeping Records for Warranties and Service
Beyond seasonal maintenance, keeping detailed records is essential for protecting your warranty. Proper documentation shows you’ve followed James Hardie’s care guidelines, which is often required for warranty claims.
- Create a maintenance log that includes dates, tasks performed, and products used. For instance, note when you cleaned the siding, the cleaning solutions applied, and any repairs or touch-ups made. Take photos of problem areas before and after repairs to create a visual history.
- Save product information from the original installation, such as paint colors, caulk brands, and touch-up materials. Keep paint can labels, receipts, and contractor details in a dedicated file. When repainting or repairing, document the brands and color codes of all materials used.
- Track warranty periods for all components. Your siding, paint, caulking, and installation work may each have different warranty timelines. Record these expiration dates and set reminders to address any issues before the warranties run out.
- File professional service records like receipts and work orders from contractors. If a company like Bayshore Exteriors works on your siding, keep their documentation with your records. A complete service history helps diagnose future issues and supports warranty claims.
Whether you use a smartphone app or a simple notebook, the key is staying consistent. A few minutes of record-keeping can save you significant money and hassle if you ever need to file a warranty claim.
Conclusion and Expert Assistance
Taking care of James Hardie siding requires consistent effort and attention. Simple tasks like rinsing the siding regularly, trimming back nearby plants, and checking the caulking can go a long way in keeping your siding in great shape for years. A regular maintenance routine not only helps prevent expensive repairs but also keeps your home looking its best.
However, some situations call for professional help. Issues like replacing damaged boards, fixing structural problems, or dealing with extensive paint failure often require expertise that goes beyond basic homeowner skills. Florida's harsh sun, salty air, and severe weather conditions can create challenges that demand a professional touch.
Knowing when to call in the pros is crucial. If you’re dealing with widespread paint chalking, multiple loose boards, or signs of water damage behind the siding, it’s time to bring in an expert. These issues often point to deeper problems that need proper diagnosis and repair. Attempting these fixes on your own could not only worsen the situation but also risk voiding your warranty.
Bayshore Exteriors offers specialized services for James Hardie siding, including installation and exterior remodeling tailored to Florida’s unique climate challenges. Their expertise covers everything from consultations to detailed finishing work, ensuring your siding performs at its best - whether you’re on the coast or inland. Professional services like these are especially valuable in Florida, where the environment can be unforgiving on improperly maintained exteriors.
FAQs
How can I tell if my James Hardie siding needs more than routine maintenance?
When checking your siding, keep an eye out for obvious signs of damage like cracks, holes, dents, or panels that appear warped. You should also note any fading colors, peeling paint, or siding that feels loose or has detached altogether. More serious problems, such as ongoing moisture damage or significant warping, might mean it's time to call in a professional for repairs beyond routine maintenance.
Regular inspections are key to catching issues early, especially after storms or the intense weather Florida often experiences.
How can I protect my James Hardie siding during Florida’s hurricane season?
Protecting Your James Hardie Siding During Florida’s Hurricane Season
To keep your James Hardie siding in top shape during Florida’s hurricane season, proper installation is your first line of defense. Make sure it’s installed following the manufacturer’s guidelines. This siding is built to handle wind speeds up to 150 mph and meets Miami-Dade County standards for High Velocity Hurricane Zones, so it’s designed to hold up against harsh storms.
Routine maintenance is just as important. Before hurricane season kicks into gear, inspect your siding for any damage or loose panels. Also, clear away debris that might scratch or damage the surface during high winds. These simple steps can go a long way in keeping your siding prepared for whatever the storm season throws your way.
What cleaning products or methods should I avoid to protect my James Hardie siding?
To keep your James Hardie siding looking its best, steer clear of metal brushes, abrasive sponges, or harsh chemicals like acid-based cleaners. These can scratch or damage the fiber cement surface. For safe and effective cleaning, mix a little mild dish soap with water and use a soft cloth or sponge. Once you're done, rinse the area thoroughly with a garden hose to remove any leftover soap.
If you decide to use a pressure washer, handle it with care. Set it to low pressure and maintain a distance of at least 6 feet from the siding to avoid harming the finish. With regular, gentle cleaning, your siding will stay beautiful and durable for years to come.