7 Mistakes When Installing Impact-Resistant Siding
7 Mistakes When Installing Impact-Resistant Siding
Avoid these 7 common mistakes when installing impact-resistant siding to protect your home from extreme weather:
- Using the Wrong Fasteners: Cheap or standard nails can rust, loosen, and fail under hurricane-force winds. Always use stainless steel or hot-dipped galvanized fasteners suited to your location.
- Skipping Expansion Gaps: Without proper spacing, siding can buckle, warp, or crack due to temperature changes. Follow manufacturer guidelines for gap sizes.
- Poor Flashing Installation: Improper or missing flashing allows water to seep behind siding, leading to mold, rot, and structural damage. Flashing must be correctly placed and sealed.
- Using Standard Trim: Regular trim isn’t strong enough to match the durability of impact-resistant siding, leaving edges and corners vulnerable to damage.
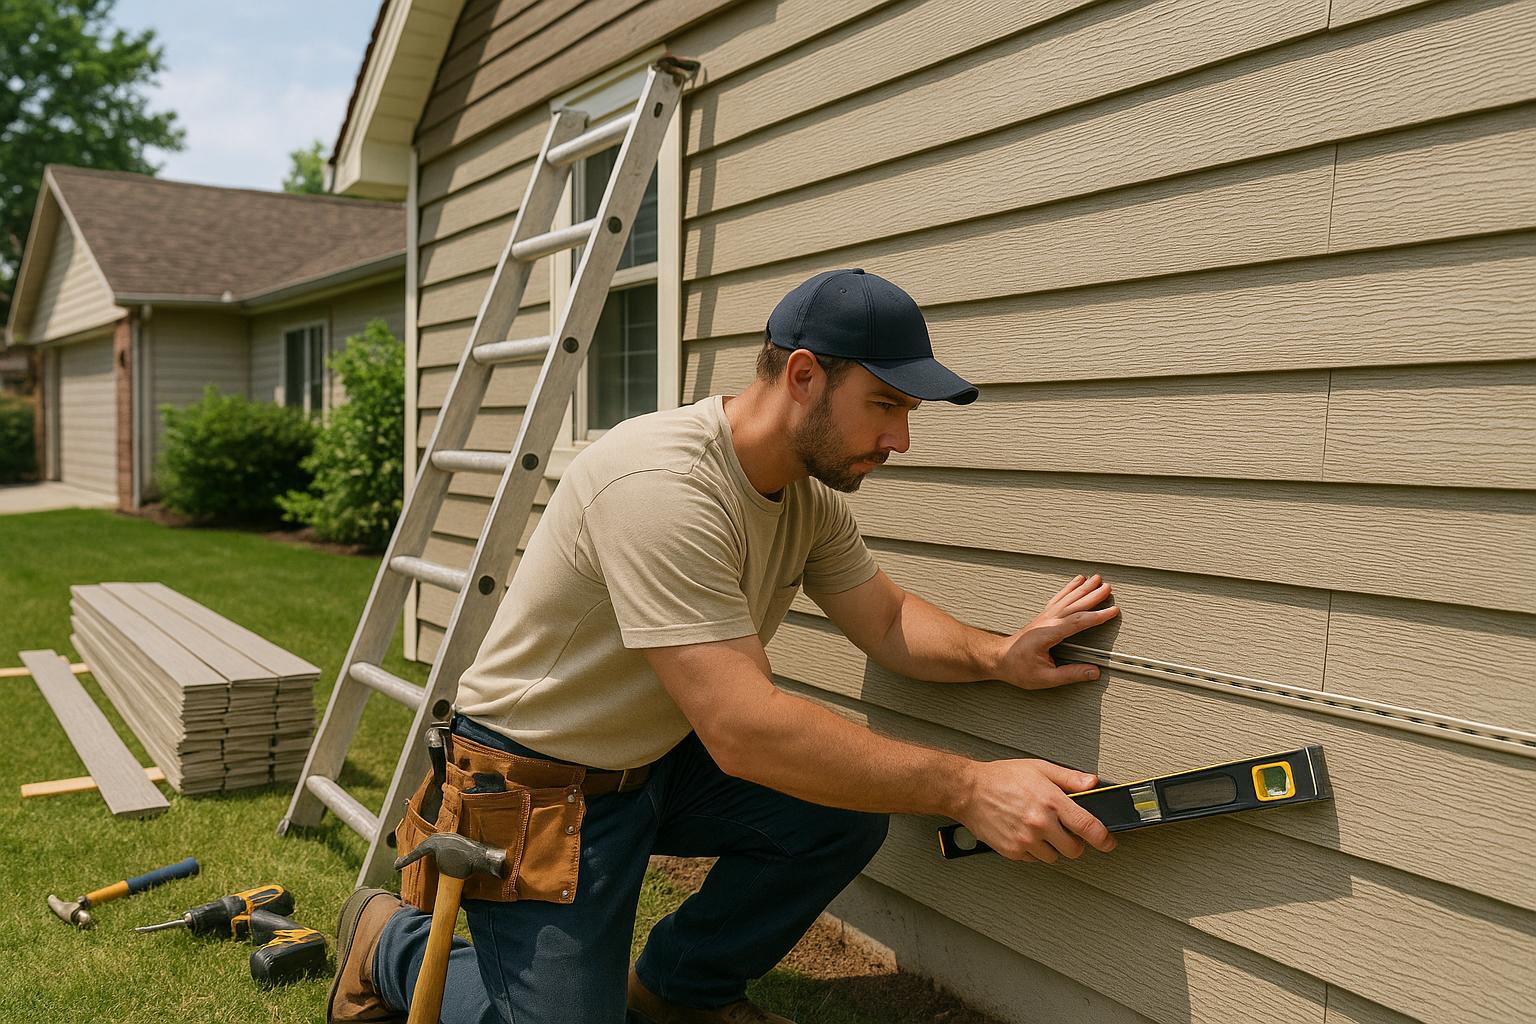
- Misaligned Panels: Misalignment creates gaps that weaken wind resistance, allow moisture in, and increase energy costs. Panels must be level and securely fastened.
- Ignoring Water Management: Trapped moisture can cause rot, mold, and pest issues. Use rainscreens, drainage systems, and water-resistant barriers to prevent damage.
- Not Following Building Codes: Florida’s strict codes ensure siding can withstand high winds and flying debris. Non-compliance risks structural failure and legal issues.
Key Takeaway: Proper installation, from fastener choice to panel alignment, is critical for impact-resistant siding to perform as intended. Hiring experienced professionals ensures your home is protected during severe weather while complying with local building codes.
James Hardie Siding Details! How To Install It By Yourself! DIY
Mistake 1: Using Wrong Fasteners
Choosing the wrong fasteners can undermine the effectiveness of your impact-resistant siding. If contractors rely on standard nails or cheap screws, they risk leaving your home vulnerable, especially in storm-prone areas. While fasteners might appear similar, their ability to withstand harsh conditions - like Florida's humid and salty environment - varies greatly.
Using incorrect fasteners can lead to rust, loose panels, and reduced wind resistance. For example, standard fasteners may start rusting within months, causing panels to sag or even fail during hurricanes. When hurricane-force winds strike, weakened fastener connections can give way, potentially ripping off entire sections of siding. This highlights just how critical fastener selection is.
Why Fastener Type Matters
Florida's climate - marked by high humidity, salty air, and fluctuating temperatures - creates the perfect environment for corrosion. Standard fasteners simply aren’t built to handle these conditions over time. That’s why choosing the right type of fastener is essential to ensure your siding performs as intended.
Stainless steel fasteners, for instance, must have at least 10.5% chromium to resist moisture effectively. Premium options like Grip-Rite® PrimeGuard MAX® screws contain 18 to 30% chromium and 6 to 20% nickel, offering even greater protection. In coastal areas within 3,000 feet of the ocean, building codes mandate stainless steel fasteners. Beyond this range, corrosion-resistant galvanized or aluminum nails are generally acceptable.
Temperature swings can also cause siding panels to expand and contract. If the fasteners can’t accommodate this natural movement, the panels may warp, buckle, or even crack over time. Understanding these risks is key to making the right fastener choices.
How to Avoid This Mistake
To avoid this mistake, select fasteners that match your specific location and siding material. For coastal areas, marine-grade stainless steel 316 fasteners - which include molybdenum to resist saltwater corrosion - are the best choice. For inland projects, hot-dipped galvanized fasteners provide excellent protection at a lower price than electro-galvanized options.
"For LP SmartSide products, use a hot-dipped galvanized nail. This type of nail has a thick protective coating that can stand up to a nail gun without chipping off the coating." - Isaac Ojeda, Construction Service Associate at LP Building Solutions
Fastener specifications are just as important as material type. Nails should have a minimum head diameter of 5/16 inch and a shank diameter of 1/8 inch. They also need to penetrate at least 1.25 inches into the framing or nailable substrate. For steel studs, self-tapping screws specifically rated for the application are required.
Proper installation techniques are equally crucial. Place fasteners in the center of nailing slots to allow for panel movement. Leave about 1/32 inch of clearance between the fastener head and the siding to prevent over-tightening. Always drive fasteners straight and level to avoid warping the panels.
Spacing is another critical factor. Horizontal panels require fasteners spaced no more than 16 inches apart, while vertical panels need spacing of 12 inches. Accessories typically require fasteners spaced between 8 to 12 inches. If staples are used, opt for 16-gauge semi-flattened ones with elliptical cross-sections, but be aware they have limits when it comes to wind resistance.
For projects in coastal environments, consider fasteners with a high ASTM B117 hour rating. This rating measures how many hours the fastener can endure continuous corrosion testing before showing red rust. Higher ratings generally indicate better long-term durability in corrosive conditions.
The right fasteners, combined with proper installation techniques, form the backbone of a successful siding project. Don’t overlook this critical detail - it could make all the difference when the next storm rolls in.
Mistake 2: Not Leaving Expansion Gaps
Skipping expansion gaps is a common error that can seriously damage even the most durable impact-resistant siding. When panels are installed too tightly, they lack the flexibility to handle natural expansion and contraction caused by temperature changes. This issue is especially problematic in regions like Florida, where temperatures can swing dramatically throughout the year.
Without the necessary space to expand in the heat, siding panels face mounting pressure, leading to buckling, warping, or even stress fractures. What starts as minor ripples can quickly escalate into more severe damage, often requiring full panel replacements. As Isaac Ojeda, Construction Service Associate at LP Building Solutions, puts it:
"Improper spacing can cause siding to buckle, a common wood siding installation mistake".
This type of buckling doesn’t just hurt the overall look of your home; it also compromises the siding’s ability to protect against wind and water intrusion.
Why Expansion Gaps Matter
Temperature shifts cause siding materials to expand and contract. For instance, vinyl siding can expand by as much as half an inch over a 12-foot length during temperature fluctuations. The molecular structure of these materials stretches in the heat and contracts as temperatures drop.
"If there is not enough space, cracking or warping can occur".
Florida’s climate adds another layer of complexity. Summer highs often climb into the mid-90s°F, while winter lows can dip into the 40s°F. On top of that, direct sunlight can heat dark-colored siding well beyond 100°F. With a 50°F temperature change, vinyl siding can expand between 0.3% and 0.4%. Since materials like fiber cement, engineered wood, and vinyl expand at different rates, following the manufacturer’s guidelines for each product is essential.
Spacing Gaps the Right Way
The correct spacing for expansion gaps depends on factors like the material, panel length, and installation temperature. For most impact-resistant siding, a gap of about 1/8 inch at butt joints - and around windows, doors, and other penetrations - allows for proper movement.
For installations in temperatures above 40°F, a 1/4-inch gap is recommended, while a 3/8-inch gap is better for colder conditions. Dark-colored siding requires the same adjustments due to its higher heat absorption. Jan Byer, Technical Services Manager at Westlake Royal Building Products, stresses:
"Always manage the movement of the product".
For LP SmartSide, a 3/16-inch gap plus the joint molding thickness is ideal. Similarly, leave a 1/4-inch gap between vertical panel edges and nearby structures to avoid binding. Around soffits, maintain about 1/4 inch of space, and leave a 1/2-inch gap between the panel and deck surfaces. These gaps ensure the panels can expand vertically without causing damage.
Professional installers often use simple tools, like a dime, to measure and maintain consistent gaps. For larger gaps, custom spacers may be necessary. A common mistake is filling expansion joints with caulk, which can hinder proper movement. As XSleeper, Group Moderator, explains:
"Standard practice here is to butt the pieces together, put a flashing behind the joint and skip the caulk. It looks better long term and won't leak. Caulking the joint has been proven to kind of crumple or bulge the butt joints when the siding needs to expand".
Installing expansion gaps correctly takes patience and precision. A 12-foot vinyl siding panel can vary in length by as much as ½ to 5/8 inch between winter and summer, highlighting just how much these materials shift throughout the year.
Mistake 3: Poor Flashing Installation
Poor flashing installation can spell disaster for impact-resistant siding projects. When flashing isn't properly installed, water can sneak behind the siding, leading to serious structural damage. This is especially critical in Florida, where heavy rains and hurricane-force winds are a regular occurrence. Getting the flashing right is not just a recommendation - it’s a necessity to protect your home and your investment.
Flashing acts as the first line of defense against water infiltration. This thin, water-resistant material is designed to redirect moisture away from critical areas like windows, doors, and roof-wall junctions. Without proper flashing, even the best impact-resistant siding can struggle to hold up against Florida’s harsh weather. And the consequences? They go far beyond surface-level issues. Water infiltration can cause structural rot, encourage mold growth, and damage interior walls, leading to expensive repairs. Florida's Building Code emphasizes the importance of proper flashing, requiring installations to follow manufacturer guidelines and AAMA standards for waterproofing and flashing.
Common Flashing Problems
Here are some common flashing errors that can compromise your siding's performance:
- Missing or Damaged Flashing: Flashing around windows, doors, and roof joints is non-negotiable. Missing or damaged sections create an open invitation for water infiltration. Some installers even skip flashing altogether, mistakenly assuming the siding alone will suffice.
- Incorrect Placement: Flashing must be installed beneath the siding, not on top. Placing it incorrectly allows water to pool against the siding instead of being diverted away.
- Improper Slope: Flashing that tilts toward the wall rather than away directs water straight into the structure. Gravity does the rest, leading to moisture problems.
- Inadequate Overlap: Flashing pieces should overlap by at least 2 inches. Skimping on overlap creates gaps where water can seep through.
- Sealing Errors: Caulking the gap between flashing and siding can trap moisture, while failing to seal edges and joints properly leaves room for water to sneak in over time.
These mistakes can lead to more significant issues. Isaac Ojeda, Construction Service Associate at LP Building Solutions, highlights a common problem with Z-flashing:
"LP SmartSide siding installation instructions require Z-flashing to have a 4-inch upper leg, but stock flashing may not always meet that requirement."
Ojeda suggests supplementing standard Z-flashing with flashing tape to meet the necessary 4-inch upper leg requirement.
How to Install Flashing Correctly
To ensure your flashing does its job, follow these best practices:
- Install Flashing Beneath the Siding: Flashing should always be placed underneath the siding to channel water away from the structure.
-
Leave Proper Spacing: Maintain a 3/8-inch gap at the siding’s bottom edge to allow for proper drainage. This prevents water from becoming trapped behind the siding.
"The purpose of metal flashing behind the butt joint is to help protect against water intrusion and to help protect the housewrap from UV degradation."
- Isaac Ojeda, Construction Service Associate at LP Building Solutions
- Ensure Adequate Overlap: Overlap each piece of flashing by at least 2 inches to block water from penetrating through gaps.
- Slope Flashing Outward: Always angle flashing away from the walls to direct water safely away from the foundation.
- Use the Right Materials: If you’re in coastal areas or within 3,000 feet of the ocean, opt for stainless steel fasteners and siding products rated for high-wind or coastal conditions to combat salt air corrosion.
- Create a Continuous Drainage Plane: Flashing should integrate seamlessly with your weather-resistive barrier (WRB). Ensure the WRB overlaps the base flashings to keep water from sneaking behind the system. For stucco walls, consider using a self-adhesive flashing membrane to shield wood components from water draining through the weep screed.
- Secure Flashing Properly: Use sealants recommended by the manufacturer and ensure all fasteners are tightly secured. Replace any damaged or loose fasteners immediately to keep the flashing intact during severe weather.
- Follow Manufacturer Guidelines: Different siding products may have unique flashing requirements. Adhering to these specifications is crucial for maintaining warranty coverage and ensuring optimal performance.
Proper flashing installation plays a vital role in protecting your home during extreme weather. Regularly inspect your flashing - at least once a year - to catch any signs of wear or separation early on. A little maintenance can save you from significant headaches down the road.
Mistake 4: Using Regular Trim Instead of Impact-Resistant Trim
One of the biggest errors during impact-resistant siding installations is pairing high-quality siding with standard trim. This mismatch can weaken your home’s defenses, leaving it vulnerable to water damage and wind intrusion. Think of it this way: your siding system is only as strong as its weakest link. Regular trim simply isn’t built to handle the same forces that impact-resistant siding can withstand. For example, during Hurricane Irma - which tragically resulted in 92 deaths and caused $50 billion in damages across the U.S. - many homes with durable siding still suffered severe damage because their trim systems failed. This highlights just how important it is to ensure every part of your siding system is up to the task.
As Alex Filipuk, Founder and CEO of Ideal Siding, puts it:
"Most people don't think about their siding until a storm causes major damage. But siding is your home's first line of defense. Small issues like cracks, loose panels, or failed caulking that seem harmless now can become major entry points for wind and water during a hurricane."
His insight drives home the point: every component of your siding system, including the trim, needs to be just as tough as the siding itself.
Why Trim Quality Matters
Trim plays a key role in protecting the most vulnerable parts of your home - edges, corners, windows, and doors. These areas, where different materials meet, are prime targets for wind-driven rain and flying debris. If regular trim fails, it can create gaps that let water seep in, leading to significant structural damage.
Here’s the thing: wind doesn’t hit your home evenly. Corners and edges bear the brunt of pressure changes and turbulence, making them particularly susceptible to impact and uplift. Standard wood trim often splits or pulls away when struck, and moisture that seeps through failing trim joints can lead to serious problems like rot, mold, and pest infestations. In fact, termites and carpenter ants cause over $2 billion in property damage annually in the U.S. - more than fires and windstorms combined. Over time, water infiltration behind compromised trim can weaken your home’s structure, leading to repairs that could cost tens of thousands of dollars.
Choosing Strong Trim Materials
The solution? Make sure your trim is just as durable as your siding. If you’re investing in impact-resistant siding, your trim should provide the same level of protection. Fiber cement trim is widely regarded as the best choice for impact-resistant applications. It’s tough enough to withstand extreme weather, pests, and even fire.
Unlike vinyl trim, which can warp or crack over time, fiber cement holds up under pressure and maintains its appearance for years. It also avoids the moisture-related problems that engineered wood trim can face, such as swelling or rot. When installed correctly, fiber cement trim creates a seamless barrier that enhances the performance of impact-resistant siding.
Another strong option is LP SmartSide engineered wood, which comes with comprehensive warranties for both siding and trim systems.
For homes near the coast - within 3,000 feet of the shoreline - material selection becomes even more critical. Salt air speeds up corrosion and deterioration in standard materials, so trim in these areas should be designed specifically for coastal conditions and installed with stainless steel fasteners to prevent failures caused by rust.
As RISE Building Products emphasizes:
"The choice of trim material is crucial because it not only affects the aesthetics, but also the long-term maintenance and costs of your project. Choosing the right composite trim material can save you time, money and headaches down the road."
Investing in high-quality trim pays off in many ways: fewer maintenance issues, lower repair costs, better storm protection, and even improved curb appeal. For tailored advice on choosing the best materials for your home, consult with the experts at Bayshore Exteriors.
sbb-itb-85e0110
Mistake 5: Poor Panel Alignment
When siding panels aren't aligned correctly, your home’s ability to withstand wind takes a serious hit. Even minor misalignments can weaken the siding by creating gaps that let in moisture, pests, and drafts. These gaps don’t just affect comfort - they also allow heat to escape, which can drive up your energy bills.
Beyond efficiency, poor alignment can make your home look unkempt, reducing its curb appeal. Worse yet, it compromises the structural integrity of your siding. Properly aligned panels rely on an overlapping design to shed water and resist wind. Misalignment disrupts this system, leaving your home vulnerable to the elements.
How Panel Direction Affects Wind Resistance
Alignment plays a key role in how well your siding can handle wind. When panels are properly aligned, they work together as a single, cohesive barrier. This overlapping design deflects wind and prevents uplift. On the other hand, misaligned panels create weak points where wind can catch, causing turbulence and pressure issues.
Impact-resistant siding relies on precise alignment to form a continuous shield. Each panel needs to fit snugly against its neighbor to maintain this protective layer. Even slight errors can disrupt the barrier, leaving your home exposed to high winds.
Secure fastening is another critical factor. Misaligned panels can prevent fasteners from engaging properly, reducing their grip on the structure. This increases the risk of panels being pulled off during storms, especially if the siding has already rotted, cracked, or buckled around the fasteners. Proper alignment and secure fastening go hand-in-hand to ensure your siding performs as intended.
Tips for Straight Panel Installation
Achieving straight, well-aligned panels starts with the right tools and techniques. Begin by installing a level starter strip, using a chalk line as your guide. Check each row’s alignment with a spirit level and string line as you go.
Inspect your work as you install to catch any misalignments early. Even small errors in the first few rows can snowball into bigger issues later.
When positioning panels, make sure the butt edge of each panel fits snugly into the lock or nailing hem of the adjacent panel. Keep the entire row parallel to the side of the house. To maintain proper spacing and alignment, use spacers or shims during installation.
Also, be mindful of fastening. Use the pre-punched slots as guides, and avoid over-tightening or under-tightening the fasteners. This prevents warping and allows the siding to expand and contract naturally with temperature changes.
For a polished look, stagger the panel overlaps randomly across the surface. This minimizes visible seams and distributes stress more evenly across the siding system.
If you want professional results that enhance both durability and curb appeal, consider hiring experienced contractors like Bayshore Exteriors. They understand the importance of precise panel alignment and can ensure your impact-resistant siding is installed to perform at its best.
Mistake 6: Ignoring Water Management
Managing water effectively is a must when it comes to maintaining the performance of impact-resistant siding. If moisture gets trapped behind the siding without a way to escape, it can lead to structural damage and even health concerns for your family. This is especially critical in Florida, where the humid climate makes moisture a constant challenge.
Siding isn’t a waterproof barrier. Its job is to deflect most water while letting any moisture that gets through drain away. Ignoring this can result in expensive repairs and serious health risks. Understanding how to manage water properly can help avoid these issues.
Problems Caused by Trapped Water
When water gets trapped, it creates the perfect environment for mold to grow. Mold can trigger allergies and respiratory problems. Beyond health concerns, mold releases enzymes that break down organic materials, weakening the siding and reducing its protective qualities. It also attracts pests like termites and ants, which can worsen the damage.
To stop mold from forming, it’s essential to dry damp areas within 24–48 hours after a leak or spill. If this window is missed, mold can quickly take hold, accelerating damage.
Another issue is wood rot. When water can’t escape, it saturates the structure, leading to decay and costly repairs. Both mold and rot undermine the structural integrity of your home and the effectiveness of your siding.
Water Management Solutions
Given the risks of trapped moisture, proper water management isn’t optional - it’s essential. Just like choosing the right fasteners or aligning panels correctly, a comprehensive water management system is critical. Effective drainage and ventilation are key to ensuring any water that gets behind the siding can escape.
One of the best solutions is a rainscreen system. This setup creates an air gap between the siding and a water control layer, allowing for both drainage and ventilation. The system includes components like an air gap, a drainage plane, and vented terminations, all working together to keep moisture moving away from your home. Using a continuous drainage mat instead of traditional furring strips provides more consistent support and better protection for the siding.
A water-resistant barrier system is another critical component. This includes house wrap and flashing, which form a continuous protective envelope around your home. High-quality barriers, such as fluid-applied air products, properly installed house wrap (overlapped shingle-style and sealed with tape), or taped rigid foam, help block wind-driven rain from penetrating the siding.
Flashing is particularly important at transition points like windows and doors. These areas are common failure points if flashing is poorly installed or omitted. Proper flashing ensures water doesn’t rely on the siding for waterproofing.
Gapping between siding pieces is another detail that can’t be overlooked. These gaps allow moisture to escape instead of becoming trapped. Porous materials, which absorb water, may need larger gaps or air spaces to dry effectively. Avoid sealing or blocking drainage points with caulk, as this can disrupt the natural flow of water away from the structure.
For extra protection, prime all six sides of wood, engineered wood, or fiber cement siding, and install it over a rainscreen air gap. This step significantly improves the siding’s ability to resist rot in Florida’s moisture-heavy environment.
Finally, professional installation by experienced contractors, like Bayshore Exteriors, is key. They understand that water management isn’t just about individual components - it’s about creating a fully integrated system that keeps your home dry and your siding performing as it should.
Mistake 7: Not Following Building Codes
Building codes aren’t just guidelines - they’re legally required standards designed to keep homes safe, especially in areas prone to extreme weather. In Florida, where hurricanes are a regular threat, ignoring these codes can lead to disastrous consequences, including structural damage and legal penalties. The Florida Building Code (FBC) is among the strictest in the U.S., reflecting the state’s unique vulnerability to severe storms.
"Building codes play a vital role in ensuring the safety and resilience of structures in hurricane-prone regions like Florida." - Guardian Hurricane Protection
Adhering to these codes is just as critical as using the right materials and proper installation techniques. Building codes act as the backbone of a durable siding system. Skipping these requirements can result in structural failures, expensive repairs, and even higher insurance premiums.
Florida's Building Code Requirements
The FBC sets rigorous standards for impact-resistant siding, going far beyond standard installation practices. These requirements are designed to ensure that siding systems can endure Florida’s harsh hurricane conditions.
One key aspect is impact testing. Manufacturers must certify their siding through tests like TAS 201-94, which simulates windborne debris by firing projectiles at the siding. If the siding passes, it’s subjected to additional cyclic wind pressure tests under TAS 203-94 to ensure it can handle repeated high-wind forces.
Once testing is complete, a detailed report - signed by a licensed Florida engineer - confirms the siding meets FBC standards. Modern codes also require homes to withstand winds exceeding 140 mph, a critical measure for hurricane resilience.
How to Meet Code Requirements
Meeting these stringent standards requires preparation, the right materials, and skilled professionals. Here’s how you can ensure compliance:
- Use approved materials: Check that all siding components, fasteners, and trim meet FBC standards. Look for TAS testing certifications and Florida approval numbers instead of generic "impact-resistant" labels.
- Hire certified experts: Contractors like Bayshore Exteriors specialize in installations that meet FBC requirements. They understand that following codes involves more than just adhering to manufacturer guidelines.
- Maintain proper documentation: Keep permits, inspection records, and test reports. These documents are essential for insurance claims and property assessments.
- Understand the financial perks: Homes meeting FBC standards often qualify for insurance discounts and experience less damage during hurricanes.
- Plan for inspections: Professional contractors know when inspections are required and how to ensure each step of the installation process meets code standards.
"Complying with the Florida Building Code can drastically reduce the risk of damage and ensure the safety of your home and family during the next hurricane season." - Guardian Hurricane Protection
Taking these steps ensures your siding system can withstand Florida’s extreme weather. While cutting corners might seem like a way to save money, it often leads to far greater expenses when storms test your home’s defenses. Prioritizing code compliance isn’t just about meeting legal requirements - it’s about protecting your home and the people inside it.
Conclusion: Getting Impact-Resistant Siding Installation Right
Properly installing impact-resistant siding is all about sidestepping seven key pitfalls: using incorrect fasteners, neglecting expansion gaps, poor flashing installation, opting for standard trim instead of impact-resistant options, misaligned panels, overlooking water management, and failing to adhere to building codes. These mistakes, if ignored, can compromise the siding's performance and longevity.
For instance, hot-dipped galvanized fasteners are a must to prevent rust and structural issues, while leaving adequate expansion gaps helps avoid buckling and water damage. Flashing installation is equally critical - particularly around horizontal seams where battens end and flashing ensures water doesn't sneak in where it shouldn't.
Beyond the technical details, the financial consequences of installation errors can be staggering. Annual maintenance costs can run between $200 and $500, while a full siding replacement might exceed $15,000. Add in repair costs from improper installation, and the bill climbs even higher.
"Every product has weaknesses when not installed correctly, so working with someone who understands rainscreen building performance and addresses the cut edges, critical flashing areas, allowances for expansion, and areas requiring sealant is essential." - Lee Calisti, NCARB-certified architect
In a state like Florida, with its challenging climate, meeting strict building standards is non-negotiable. Skilled professionals ensure everything is securely fastened, perfectly aligned, and sealed to ward off water damage and warping.
This is where expertise matters. Companies like Bayshore Exteriors specialize in installations tailored to Florida's demanding weather and building codes. Their meticulous attention to detail - from alignment to sealing - ensures your siding performs as it should, protecting your home for years to come.
It's also worth noting that warranties often hinge on professional installation. Many manufacturers require licensed contractors to perform the work for the warranty to remain valid, making the choice of contractor a pivotal decision.
FAQs
What are the benefits of using impact-resistant trim instead of standard trim for siding installations?
Impact-resistant trim is built to last, making it a practical option for siding projects. It’s crafted to handle tough weather conditions, deflect impacts from debris or hail, and shield your home from moisture - helping to prevent issues like mold and rot.
By cutting down on maintenance and increasing the longevity of your siding, this type of trim can save you money on repairs over time. Plus, its toughness and protective qualities can enhance both the look and value of your home’s exterior.
Why is choosing the right fasteners important for impact-resistant siding in coastal areas?
Using the proper fasteners is crucial for maintaining the strength and longevity of impact-resistant siding, especially in coastal regions. These areas present unique challenges, like high humidity, salty air, and constant moisture, all of which can quickly wear down standard fasteners and compromise the siding's stability.
To combat these issues, stainless steel fasteners, with 316-grade stainless steel being a top choice, are strongly recommended. This material provides excellent resistance to corrosion and offers the durability needed to withstand tough weather and salty environments. Opting for reliable, high-grade fasteners helps ensure your siding stays firmly in place and performs well, even in the demanding conditions of coastal climates.
Why is it important to follow building codes when installing impact-resistant siding in hurricane-prone areas like Florida?
The Importance of Following Building Codes for Impact-Resistant Siding
In hurricane-prone areas like Florida, sticking to building codes when installing impact-resistant siding isn’t just a recommendation - it’s a necessity. These codes, such as the Florida Building Code (FBC), are specifically crafted to safeguard homes from extreme weather. For instance, the FBC mandates that structures in certain regions must endure wind speeds exceeding 180 mph. These guidelines are designed to minimize the potential for catastrophic damage during hurricanes.
Adhering to these standards ensures that impact-resistant siding, along with other protective measures like reinforced windows and doors, can perform as intended against flying debris and harsh winds. Homes built to meet these codes have repeatedly shown greater resilience in storms, giving homeowners both peace of mind and lasting protection.