
Impact Sliding Doors in Tampa Bay: What the Installation Requires
Checklist of rough opening, approvals, anchoring, sill pans, and permitting for impact sliding door installs in Tampa Bay.
Lorem ipsum dolor sit amet, consectetur adipiscing elit. Suspendisse varius enim in eros elementum tristique. Duis cursus, mi quis viverra ornare, eros dolor interdum nulla, ut commodo diam libero vitae erat. Aenean faucibus nibh et justo cursus id rutrum lorem imperdiet. Nunc ut sem vitae risus tristique posuere.
A Tampa Bay impact slider install only works if your opening, wall type, anchoring, drainage, and permit paperwork all match the approved door system.
A patio door swap can stay simple. Or it can turn into a repair job fast. If your rough opening sits out of square by more than 1/8 inch, the sill does not drain, the header sags, or the wall material does not match the Florida Product Approval (FL#) or Miami-Dade NOA, the crew has to stop and fix the opening first. In many Tampa Bay jobs, that extra framing or sill work adds about $500 to $1,500+.
Here’s the short answer: you need the right rough opening size, a sound header, jambs, and slab, the correct design pressure rating, the approved fastener pattern, a working sill pan and weep path, and a permit that matches the exact door series. Miss one of those, and the job can fail inspection or leak during wind-driven rain.
You should expect these checks before the door gets ordered:
- Measure the rough opening at top, middle, bottom, left, center, and right
- Check square and plumb so heavy panels do not bind
- Confirm substrate type such as CMU, poured concrete, or wood framing
- Review the FL# or NOA for size limits, DP rating, and anchor schedule
- Inspect for damage like rot, termite issues, cracked block, or weak sill concrete
- Plan water control with sill pan, end dams, flashing, sealant, and open weep holes
- Verify the permit scope and final inspection steps in Hillsborough County or Tampa
Think a product label is enough? But... it is not. The approval document controls the install, and the county inspector checks the finished job against that paperwork.
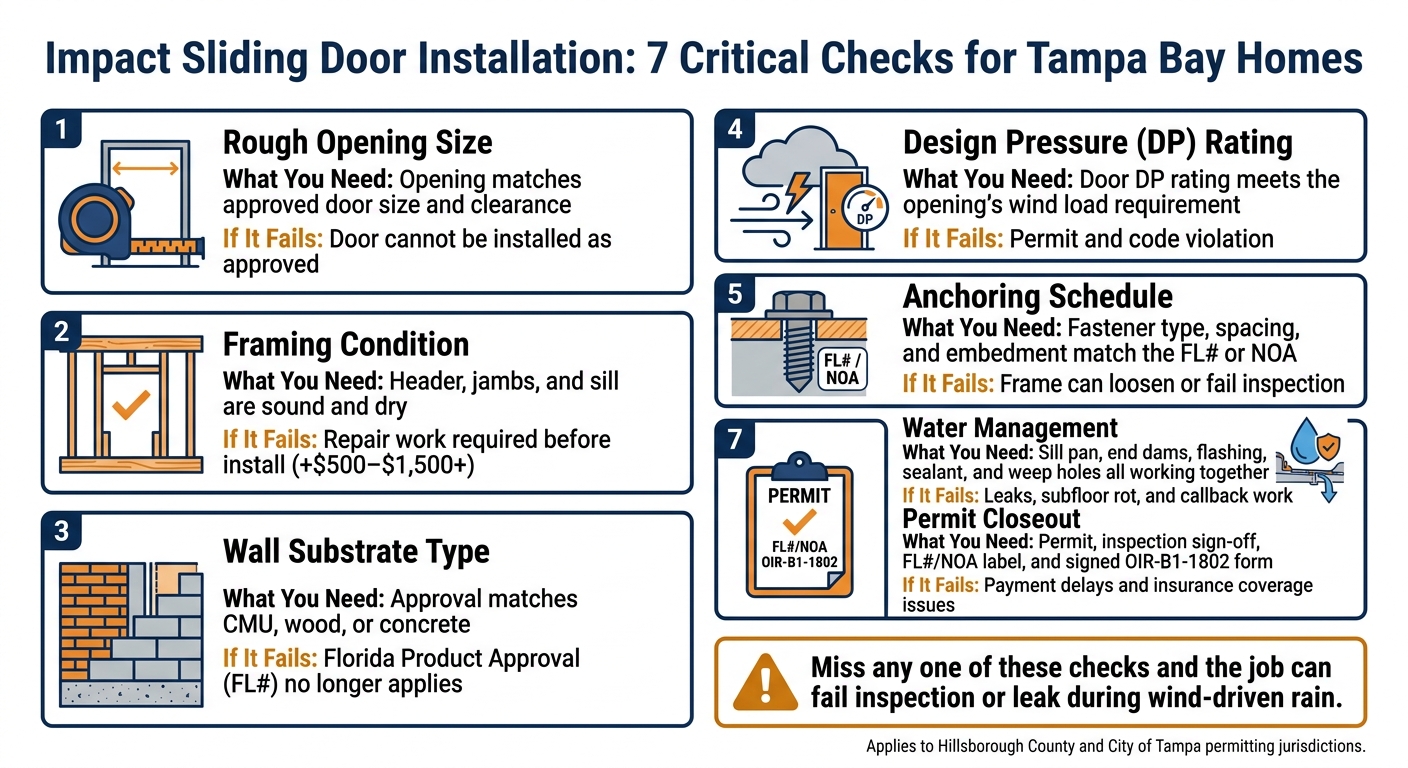
Impact Sliding Door Installation Checklist: 7 Critical Checks Before You Begin
Installing Hurricane Impact Sliding Glass Doors and Windows to a Block Structure
sbb-itb-85e0110
Quick Comparison
| Installation check | What you need to confirm | What happens if it fails |
|---|---|---|
| Rough opening size | Opening matches approved door size and clearance | Door cannot be installed as approved |
| Framing condition | Header, jambs, and sill stay sound and dry | Repair work starts before install |
| Wall type | Approval matches CMU, wood, or concrete | Approval no longer applies |
| DP rating | Door rating meets the opening’s wind load | Permit and code issue |
| Anchoring | Fastener type, spacing, and embedment match approval | Frame can loosen or fail inspection |
| Water management | Sill pan, flashing, sealant, and weeps work together | Leaks, rot, and callback work |
| Permit closeout | Permit, inspection, FL#/NOA label, and OIR-B1-1802 line up | Payment and insurance issues |
The rest of the article breaks down how each of those checks affects your install, your permit, and your final inspection.
Opening Size and Framing Determine Whether the Door Can Be Installed as Approved
The finished opening doesn’t control the install. The installer needs the structural rough opening behind the trim and drywall, then has to confirm that it’s the right size, in good shape, and built from the right wall substrate. That rough opening, not the finished trim, decides whether the approved door will fit.
The exact clearance and anchoring rules come from the Florida Product Approval or Miami-Dade approval for that unit. If the opening falls outside those limits, the crew has to alter it, and that can add $500 to $1,500+ to the project cost in the Tampa Bay market. But there’s a hard line here. If the opening doesn’t match the listed size and fastening pattern, the door cannot be installed as approved. If the opening misses those limits, work stops until the framing is fixed.
What to Measure Before the Door Is Ordered
Take width at the top, middle, and bottom, and height at the left, center, and right. Don’t trust the old frame. One reading can miss bowing, out-of-square framing, or settlement.
The installer also has to check more than width and height. The sill and slab condition matter. So does the interior floor height compared with the exterior patio elevation, along with the wall depth, so the new frame sits right with the interior and exterior finishes. Header capacity also needs confirmation before anyone orders the door.
In other words: these measurements decide whether the opening can take the approved unit without structural changes.
| Item to Measure/Inspect | Why It Matters | When Repair or Structural Review Is Needed |
|---|---|---|
| Width & Height (multiple points) | Confirms the assembly fits within approved clearance | If the rough opening is smaller than the assembly or outside the approved tolerance |
| Header Capacity | Must resist dead load and wind-pressure loads | If the header shows sagging, rot, or termite damage |
| Jamb Plumb & Square | Heavy panels bind and locks fail if the frame is racked | If diagonal measurements differ or the opening is out of square by more than 1/8 inch |
| Sill & Slab Condition | Provides the foundation for the track | If the slab is uneven, cracked, or has settled |
| Substrate Type | Some approvals are specific to CMU masonry or wood framing | If the substrate doesn't match the door's FPA or NOA |
| Floor Elevation | Determines threshold height and drainage path | If the exterior patio sits level with or above the interior floor without a proper sill pan |
What Existing Damage Can Stop a Compliant Installation
A new impact door won’t make up for weak framing or failing substrates. Rot, termite damage, cracked masonry, or broken-down sill concrete all need repair before anchors go in. If the header is undersized or sagging, fix that first.
Here’s why: anchors must meet the pull-out values in the approval, and damaged material often can’t hold them. Once the wall is open, any trouble in the opening has to be repaired before a compliant installation can move forward. Those repairs must be done before anchoring starts.
Florida Approval Documents Control Door Size, Pressure Rating, and Anchoring Pattern
Once you confirm the opening, the approval document sets the code limits for the door. In Hillsborough County, Tampa Bay sits in Florida's wind-borne debris region, so exterior openings must use impact-rated products or approved shutters. The product approval - either a Florida Product Approval (FPA) number formatted as FL#####-R## or a Miami-Dade Notice of Acceptance (NOA) - ties the door to the exact opening in your home.
Here’s the part many homeowners miss. If the door, the opening size, the wall material, and the anchoring pattern do not match the approval document, the install does not meet code. That document, not the product label, controls the install.
Before you sign a contract, ask the contractor for the exact FPA or NOA number in writing. Then check that number in the DBPR database before work starts.
Which Approval Details Control the Install
The approval document spells out the exact conditions for that door installation. The details that matter most are:
- Design Pressure (DP) rating
- Maximum approved dimensions
- Approved wall material
- Anchor type, spacing, and embedment depth
- Panel connection details for multi-panel units, if they apply
DP is site-specific. It must match your house, your exposure, and the door's location on the structure. The door's rated DP must meet or exceed the calculated requirement for that exact opening.
Size matters just as much. If the installed door goes past the tested width or height, the DP rating no longer applies, and the permit no longer works, even if the unit physically fits the opening.
Anchoring rules are just as strict. The approval sets the anchor type, spacing, and embedment depth. In other words: the approval covers the full door assembly, installed exactly as shown. Change one part outside that document, and you break code compliance.
Impact Glass and Shutters Are Not Interchangeable Without Approval for the Specific Opening
Florida code gives you two paths for opening protection in the wind-borne debris region: an impact-rated door or a non-impact door with an approved shutter system. Impact doors stay in place year-round. Non-impact doors depend on a shutter system matched to the exact opening.
But... shutters are not a plug-and-play substitute. The shutter route needs its own approval paperwork, and the shutter system and the opening it protects must be approved together. A shutter approved for one opening size or one wall type cannot be moved to a different setup and still meet code.
Impact doors remove that extra deployment step. Those approval limits then carry straight into the anchor, sill-pan, and flashing rules.
Anchoring, Sill Pans, and Flashing Make the Installation Storm-Ready and Watertight
An impact-rated door helps. But the installation is what decides how it holds up in wind and rain.
Use the wrong fasteners, skip the sill pan, or botch the flashing, and you can ruin an approved door assembly. Once you’ve confirmed the opening and the approval, these details decide whether the door stays storm-ready and watertight.
The table below shows the parts that cause the most trouble when crews install them the wrong way.
| Component | Job in the Assembly | Common Failure That Causes Problems |
|---|---|---|
| Anchor Fasteners | Transfer wind loads from the frame to the structural substrate (wood or concrete) | Pull-out or frame deflection from improper embedment depth or spacing |
| Sill Pan | Primary defense against water wicking under the threshold | Interior leaks and subfloor rot from missing end dams or no waterproofing membrane |
| Flashing/Sealant | Bridges the frame-to-wall transition to block moisture and air | Moisture wicking behind the frame when approved exterior sealant is not used |
| Structural Shims | Keep the frame level, plumb, and square under heavy panel loads | Binding panels or accelerated track wear if the frame is not set level and plumb |
| Weep Paths | Allow water that enters the track to drain to the exterior | Water overflow into the interior when weeps are blocked by debris or stray sealant |
Why Fastener Type, Spacing, and Embedment Cannot Be Guessed in the Field
Fastening comes next, and there’s no room to wing it. The approved fastener schedule sets the exact fastener type, spacing, and embedment for each substrate, whether that’s concrete block (CMU), wood framing, or poured concrete.
Those numbers do not swap from one substrate to another. A masonry anchor driven into CMU at the wrong spacing, or a structural screw used in masonry, breaks the approval and voids code compliance.
In coastal Tampa Bay, fasteners also need corrosion resistance. That part matters more than some homeowners think. Salt air chews through the wrong hardware faster than expected.
Edge distance matters too. If an installer anchors too close to the edge of concrete or masonry, wind pressure can crack or spall the material.
The frame’s factory-prepared hole locations and the approved hole pattern control where fasteners go. No guesswork. Any change from the approved setup makes the door noncompliant. Installers must follow the approved embedment and fastening schedule, not drive fasteners by feel.
The Sill Pan and Drainage Path Are the First Defense Against Rain Intrusion
Once the frame is anchored, water control becomes the next job. That starts before a storm ever hits full force.
A waterproofing membrane must go on the sill pan before the frame is set. End dams on both sides of the pan stop water from moving sideways into the wall framing. Then exterior flashing tape bridges the frame-to-wall transition in a shingle-style sequence, so each layer overlaps the one below and sheds water outward instead of trapping it behind the frame.
That flashing also needs to tie into the home’s weather-resistive barrier. It can’t just sit on top of it. In other words: the layers have to work together as one drainage path.
Standard silicone doesn’t do the job here. The perimeter joints need approved exterior sealant that can flex under hurricane pressure cycles.
Weep holes at the sill track serve as the last drain path. They let water that gets into the track move back outside instead of backing up into the house. Blocked weeps, from debris, stucco, or stray sealant, are one of the most common reasons a door leaks during wind-driven rain, even when the rest of the installation looks right.
Before the job is done, the contractor should check every weep path and make sure it stays open and clear.
Hillsborough County Permitting and Final Inspection Determine Whether the Job Closes Out Cleanly
Once the opening, approval, and anchoring details are set, permitting and inspection decide whether the job closes out legally. Your address controls which office handles the permit. Unincorporated Hillsborough County and the City of Tampa use different permitting offices, forms, and fees.
Think the paperwork can wait until later? It can't. Confirm which office applies to your address before you sign any contract. Once those opening, approval, and anchoring details are set, the permit package locks the job into code compliance. Final inspection then checks that the installed door matches the approved documents and passed local code review.
What Should Appear in the Permit Scope Before Work Begins
The permit submittal needs to match the approved door series, configuration, anchorage schedule, and design-pressure ratings for the opening. If the project needs header repairs or framing corrections, those items must appear in the permit scope too.
Before you sign, confirm the contractor is pulling the permit under their license. Do not let the contractor shift the permit to you as owner-builder. Verify the contractor's license through the Florida Department of Business and Professional Regulation (DBPR).
Ask one more direct question: is a pre-install rough inspection required before installation starts? That detail matters. The paperwork should match the exact door and the exact installation method before the crew begins work.
What to Verify Before Making the Final Payment
After the installation passes inspection, use the closeout checklist to confirm the work finished exactly as permitted. This is where small misses turn into big headaches.
Before you make the final payment, inspect the completed installation. The frame must be plumb, level, and square. Panels must slide smoothly, and the lock and interlocks must engage without force.
Check these items before you release the last payment:
- The weep holes in the bottom track are open and clear, not blocked by debris, stucco, or sealant.
- The permanent frame label matches the FL# or NOA in the permit file.
- You received the final inspection sign-off.
- You collected the signed wind mitigation form, OIR-B1-1802.
That last document matters for your insurance. You submit the signed wind mitigation form to your carrier to qualify for the wind mitigation discounts Florida law requires carriers to offer under Statute 627.0629.
FAQs
Do I need a permit to replace an impact sliding door in Tampa Bay?
Yes. Replacing a sliding glass door in Tampa Bay requires a building permit. In Hillsborough County, residential jobs don't get a pass.
That permit helps the county check that the new door meets Florida code for wind load and impact resistance. You or your installer must submit the manufacturer’s Florida Product Approval. A final inspection also has to happen, so the inspector can confirm the door, flashing, and anchoring match the approved installation.
What can delay or increase installation costs?
Costs go up fast when crews don’t measure and confirm the rough opening before work starts. That leads to rework. The same thing happens when the existing framing needs upgrades or structural changes, like widening the opening or adding headers.
Delays show up for the same reason. Sometimes the wall type calls for different anchoring or flashing than the team expected. Other times, permits or inspections take longer than planned.
But code issues can slow everything down even more. If the installer doesn’t use the required Florida Product Approval/HVHZ documents, or skips approved anchors, spacing, sealant, and fastening, the job may need to be redone to meet code.
How do I know the door was installed to code?
Check that the door has a current Florida Product Approval number or, in Miami-Dade, Broward, or the HVHZ, a Miami-Dade NOA for that exact setup.
But approval on paper isn't enough. The installer also needs to follow the approved details for the rough opening, framing, anchoring, flashing, water management, and perimeter sealing, and the permitted job should pass local inspection.
Related Blog Posts
✔ START TODAY
Personal and targeted approach

✔ FAQ
Your Questions. Our Expertise.
How do I get an accurate price for my project?
Are you licensed and insured in Florida?
How long does a typical installation take?
Does your work come with a warranty?
Why do you recommend James Hardie siding for Florida?
What specific services do you provide?
✔ START TODAY
Ready to Get Started?
Trusted and reliable Hardie board siding services backed by expert craftsmanship and high performance materials. We help homeowners achieve a durable, low maintenance exterior that looks great and stands strong for years to come.
Book an Appointment
We have received your estimate request and will be reaching out to you shortly.
.webp)